

Most joints do not fail because the layout was wrong. They fail because the last half millimeter was handled with sandpaper, a dull chisel, or hope. I spent 34 years installing trim and cabinets, and I have seen more gappy miters and torn shoulders than I care to remember. When I retired four years ago and set up a shop in my two-car garage outside Boise, I promised myself I would stop fighting my tools. I rebuilt my hand tool kit that first winter. The Narex six-piece set was part of that rebuild, and it has been on the bench for three years now.
Paring clean joints is not a trick. It is a sequence. The chisel has to be flat on the back, sharp at the edge, and guided by a line you can feel. The cut has to be light enough that you can stop before the good wood goes. And the waste has to come out in the right order. Get those four things right and a joint can look like it came off a machine, even when it came off a bench with a wooden mallet and a pair of hands.
A sharp chisel is the difference between a joint that closes and one that almost closes
The Narex set is the one I reach for when a shoulder needs a clean paring pass. Six sizes, a wooden box, and an edge that rewards an hour of setup.
Amazon See the Narex Set on Amazon →Step 1: Flatten the back before you touch the bevel
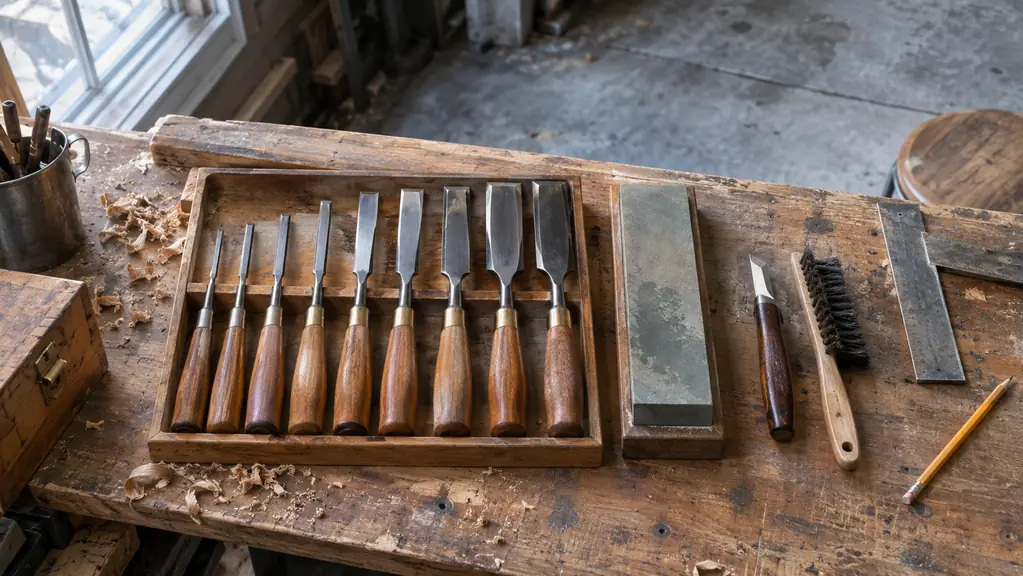
Out of the wooden presentation box, the Narex chisels are not ready to pare. The backs need flattening and the edges need honing. That is not a knock. Most bench chisels arrive the same way. The back is the reference surface. If it is hollow or polished only near the edge, the chisel will rock and the cut will follow the rock. I spend about an hour on a new chisel, and I do the whole set at once.
I put the back flat on the Norton oil stone, coarse 100 grit side first, and work the full length with light pressure. The stone is 8 by 2 by 1 inch, a combination bench stone, and it is lubricated with a light honing oil, never water. I check the stone for flatness once in a while. When the scratch pattern is even across the back, I move to the fine side. I finish on a leather strop. The goal is not a mirror. The goal is a back that sits flat on the wood so the bevel can do its job.
The six sizes are 6, 10, 12, 16, 20 and 26 mm. I flatten all of them in one session because the habit matters more than the individual chisel. The 6 mm and the 10 mm are the ones I use most for paring small joints, and they are also the easiest to tip if the back is not flat. A flat back on a small chisel is worth more than a fancy honing setup. If you only do one thing before your first joint, do this one.
Step 2: Hone the 25 degree bevel at 30 degrees and keep it fresh
The Narex chisels are ground to a 25 degree bevel. I do not change that. I hone at 30 degrees with a simple side-clamp honing guide, which puts a small microbevel at the edge and saves me from polishing the whole bevel every time. The steel is chrome-manganese, hardened to Rc 59, and it takes a clean edge without feeling brittle. The handles are stained European beech. There are no steel hoops or strike caps, so the chisel gets a wooden mallet, never a steel hammer.
I hone little and often. A paring cut in walnut or cherry will dull an edge faster than most people expect. Two or three passes on the fine side of the Norton stone, a few strokes on the strop, and the chisel is back. I keep the stone on the bench, not in a drawer. If I have to walk to get it, I will keep cutting with a dull edge and the joint will show it.
The 25 degree bevel is a good compromise for bench work. It is keen enough to pare end grain and strong enough to take a light mallet tap when I am chopping a hinge mortise or a shallow mortise in an end table. If I were chopping heavy mortises all day I might want a different bevel angle, but for furniture joints and trim details it has held up. Three years in, the edges are still easy to bring back.
Step 3: Lay out with a knife line, not a pencil
A pencil line is a suggestion. A knife line is a wall. I mark the shoulder with the IRWIN combination square, a 12-inch stainless steel blade with a metal body and black etched scales in 1/16 inch graduations. It marks 90 and 45 degrees, the sliding blade locks with a knurled nut, and it works as a depth and marking gauge. I checked mine by the flip test against a straight edge when it was new, and it was true. I do not call it machinist grade. I call it square enough for furniture, and it has stayed that way.
I score the line once with a marking knife, then again with the chisel's back corner if the line needs to be deeper. The knife line gives the chisel a place to register. Without it, the edge can skate across the grain and take a bite where you did not plan. On a shaker end table or a cherry bookcase, that one bite is the difference between a clean shoulder and a patch.
I mark the waste side clearly and I keep the line visible. If the line disappears under shavings, I stop and brush the bench clear. It sounds fussy. It is not. A clean joint is mostly a matter of not cutting where you did not mean to cut. The knife line is the cheapest insurance in the shop. It also gives you a place to stop, which matters more than speed.
The knife line is not decoration. It is the fence the chisel follows when your hand is not perfect.
Step 4: Pare to the line in light passes
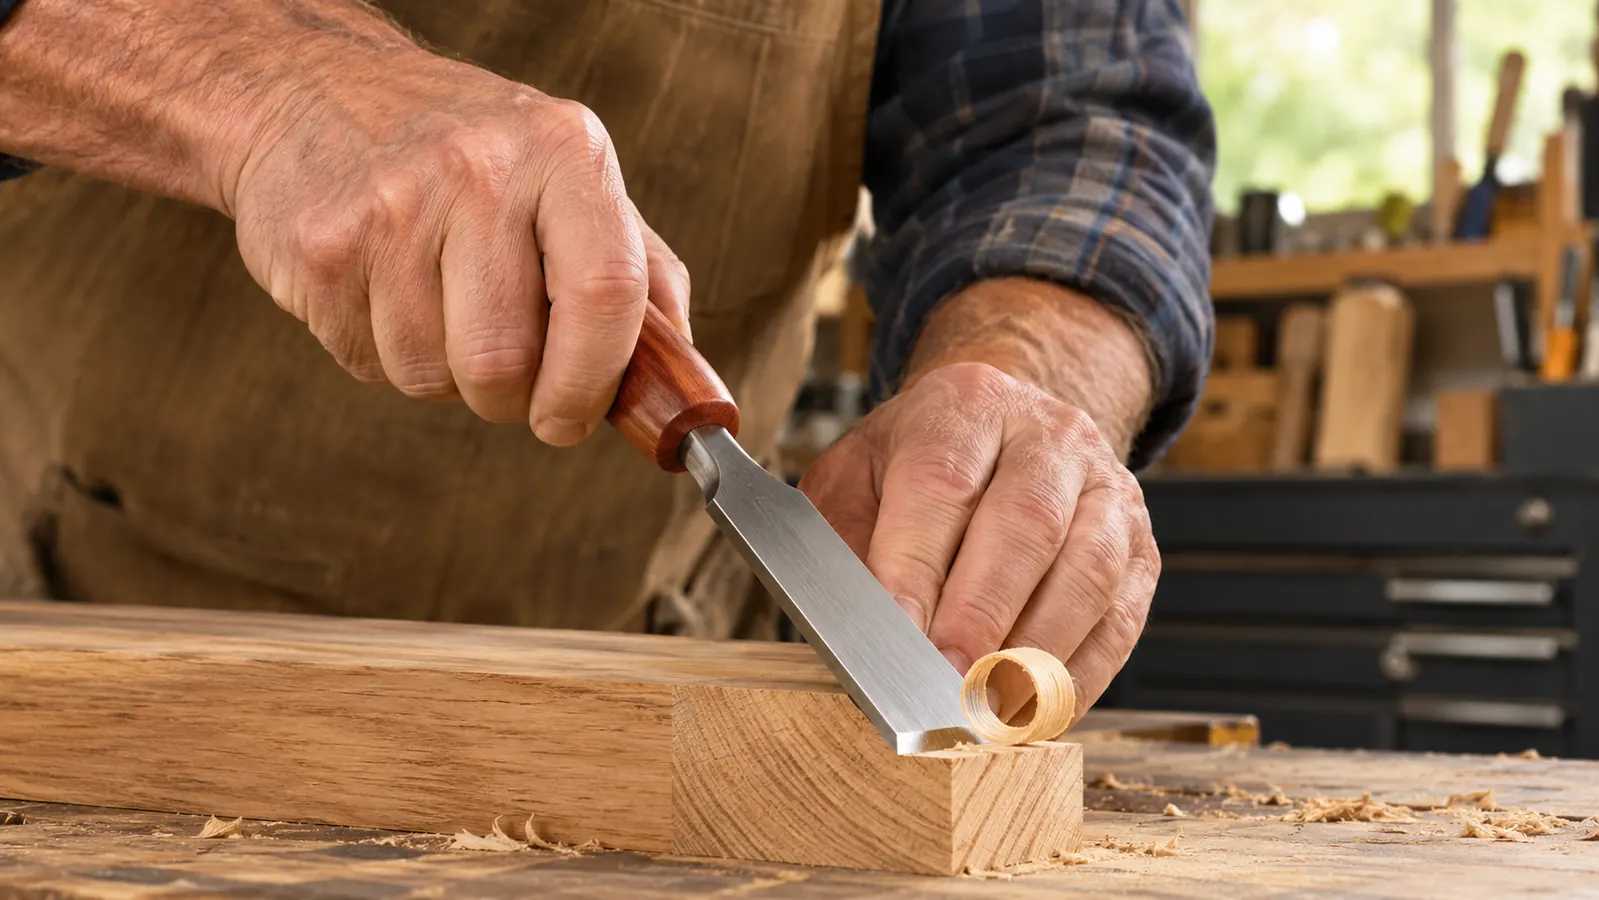
Now the Narex chisel earns its keep. I hold the handle in my dominant hand, the back of the chisel flat on the wood, and the edge just behind the knife line. My other hand guides the blade, thumb and fingers spread, so the cut is controlled. I take a light pass. Then another. I do not try to remove the whole waste in one push. A paring cut should sound like a quiet zip, not a crunch.
For a shoulder, I work from the outside toward the line. For a tenon cheek, I work down to the shoulder, not away from it. The bevel-edge bench chisel can get into a corner without the sides bruising the wall of the joint. I keep the back flat. If the chisel tips, the cut dives. If the cut dives, stop and re-establish the flat. The wood will tell you before the line does.
I check the fit with the square and with a light test. If I see a gap, I do not reach for sandpaper. I find the high spot with a pencil mark and take one more paring pass. Sandpaper rounds the edge and the gap comes back as soon as the clamp pressure comes off. A chisel leaves a flat surface. That is the whole point.
Step 5: Chop the waste and clean the corners with a wooden mallet
Paring gets you close. Chopping gets you to depth. I set the chisel on the knife line with the bevel facing the waste, give it a light tap with a wooden mallet, and work across the joint in small bites. The Narex handles are stained European beech and there are no steel hoops or strike caps, so a steel hammer is out. A wooden mallet is not a suggestion. It is how the tool is made.
I clear the corners with the 6 mm chisel. It is the smallest in the set and the one that gets used more than people expect. I pare the end grain first, then the long grain, so the exit cut does not tear the shoulder. When the joint closes, I check it with the square and look for light. If there is a gap, I find the high spot with a pencil mark and take one more pass. I do not sand a joint to fit.
Chopping is where a chisel with no hoops asks for discipline. I keep the mallet light and I let the edge do the work. If the chisel sticks, the cut is too deep or the edge is dull. I pull it out, hone it, and start again with a lighter bite. A joint that is forced together will show a crushed shoulder a week later under finish. The joint should close with hand pressure, not with a clamp doing the work of a chisel.
What Else Helps
A clean joint is not one tool's work. The IRWIN Quick-Grip mini clamps are what I use for small assemblies, drawer parts, jigs and holding a stop block. I have one pack of four 6-inch one-handed bar clamps. They have resin bodies, hardened steel bars and soft pads, a trigger squeeze to tighten and a quick release. They are rated up to 140 pounds of clamping force. They do not clamp a tabletop. For wide panels I use pipe clamps.
For glue-up, I use Titebond III. It gives me about 8 to 10 minutes of working time, I clamp for at least an hour, and I leave the joint 24 hours before I put stress on it. It is waterproof, ANSI Type I, and approved for indirect food contact, which matters on cutting boards. It cleans up with water while wet and dries a light tan. I do not use it below 47 degrees. In winter I keep the bottle indoors and warm the shop first. I have used it for about 12 years.
A clean joint still needs a clean glue surface. I do not touch the freshly pared face with my fingers. I brush off the shavings, check the fit one more time, and glue. The clamp only holds what the chisel has already made true. If the joint is gappy before the glue, the clamp will not fix it. I would rather take one more light paring pass than spend the next hour trying to close a gap that should never have been there.
If your joints are almost closing, the chisel is the first thing to check
The Narex six-piece set has been on my bench for three years. Flatten the backs, hone the edges, and let the knife line do the guiding.
Amazon See the Narex Set on Amazon →